

Making your list and checking it twice?! Well if you’re still looking for a way to spruce up your Christmas table, today’s post is for you! I am SO excited to have Christina Brockman of Huckleberry Collective joining us on the blog today to share an easy DIY compote arrangement for Christmas. You may remember this post she shared with us a few summers ago. It was such a hit, I invited her back again for a winter edition. Now, on to the details!
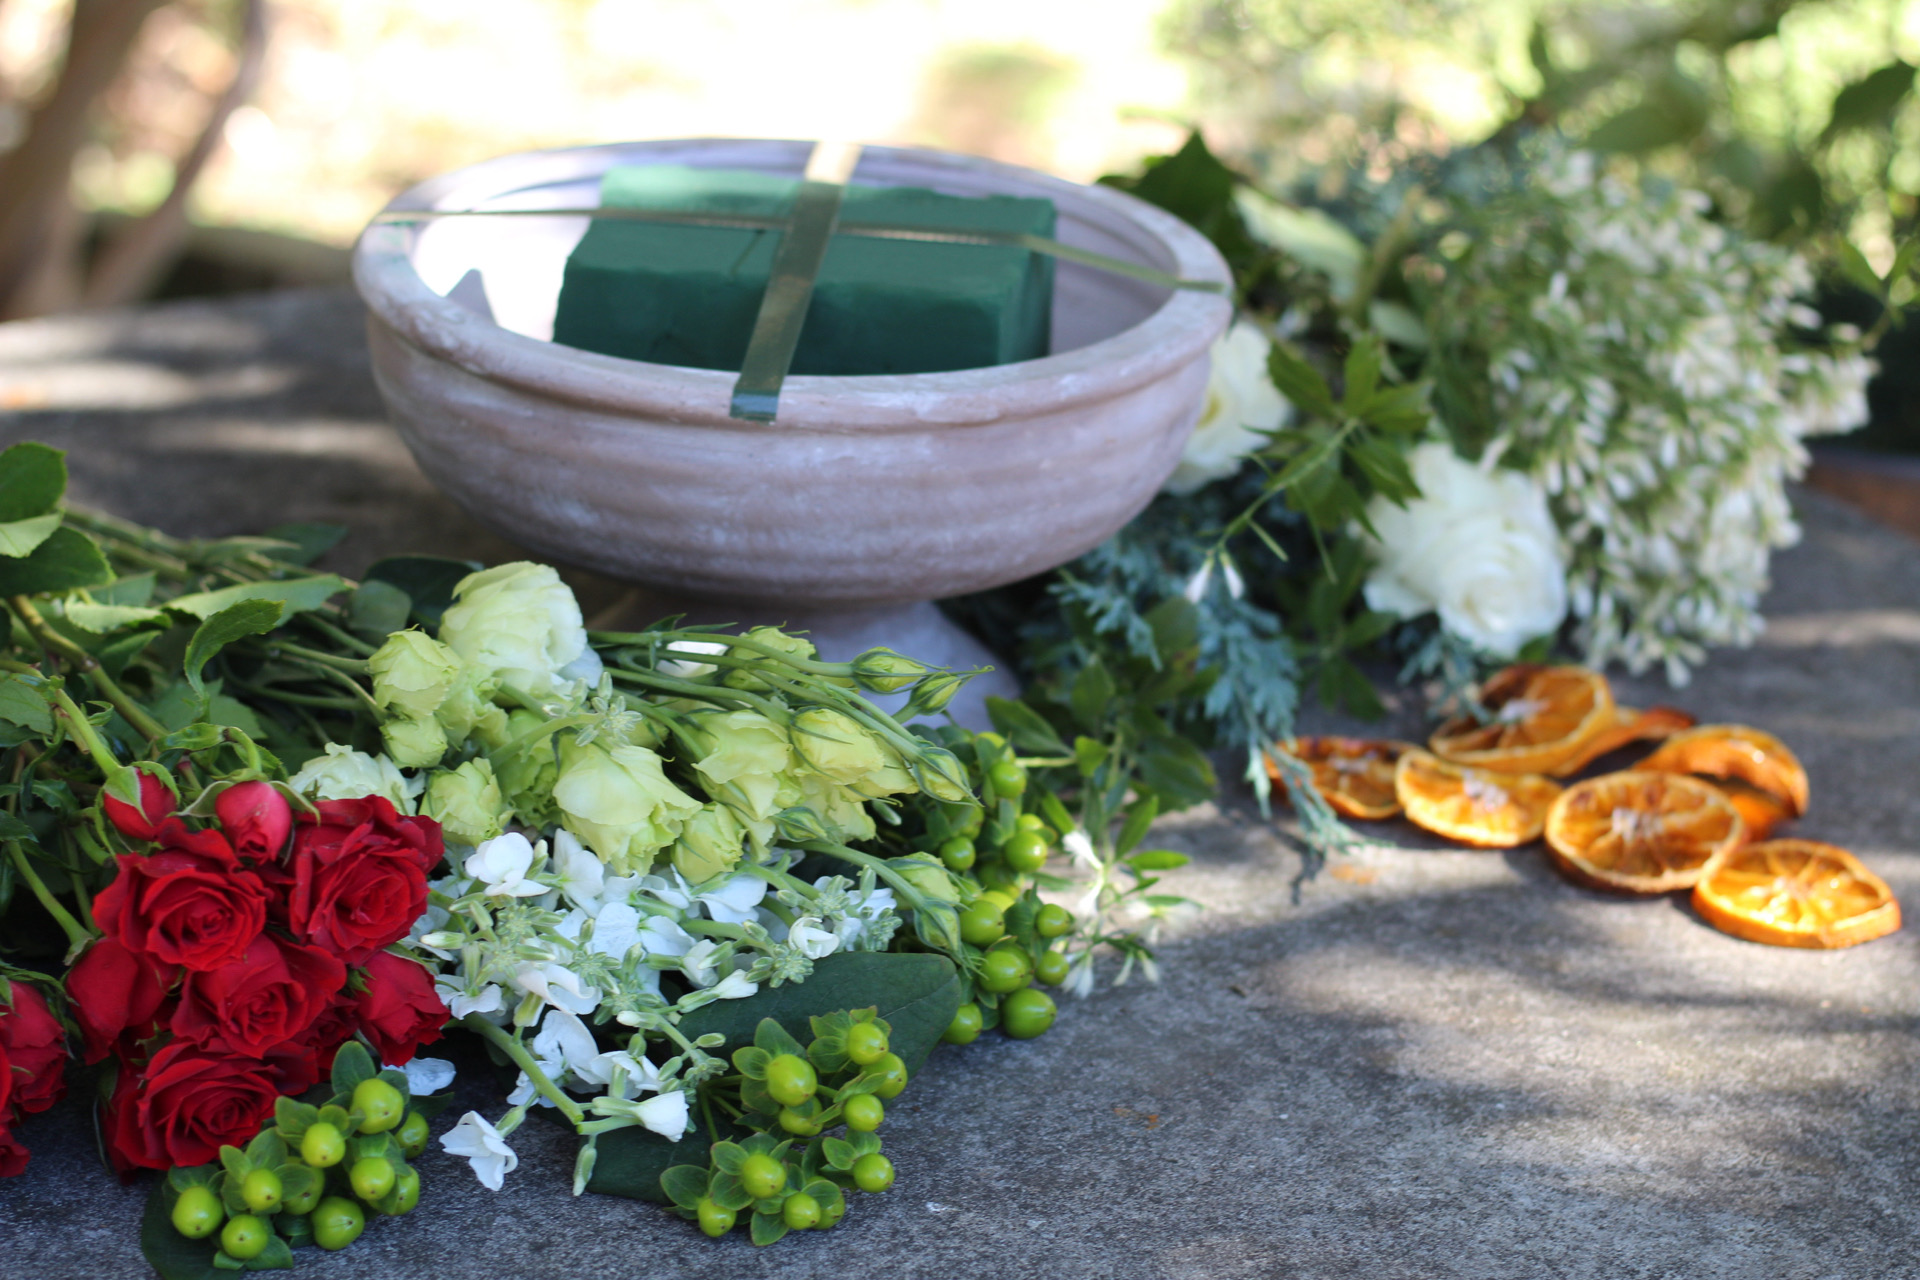
Supplies: Floral Snips or Clippers, Florals, a Pot or Vase, Floral Foam and Floral Tape.
-
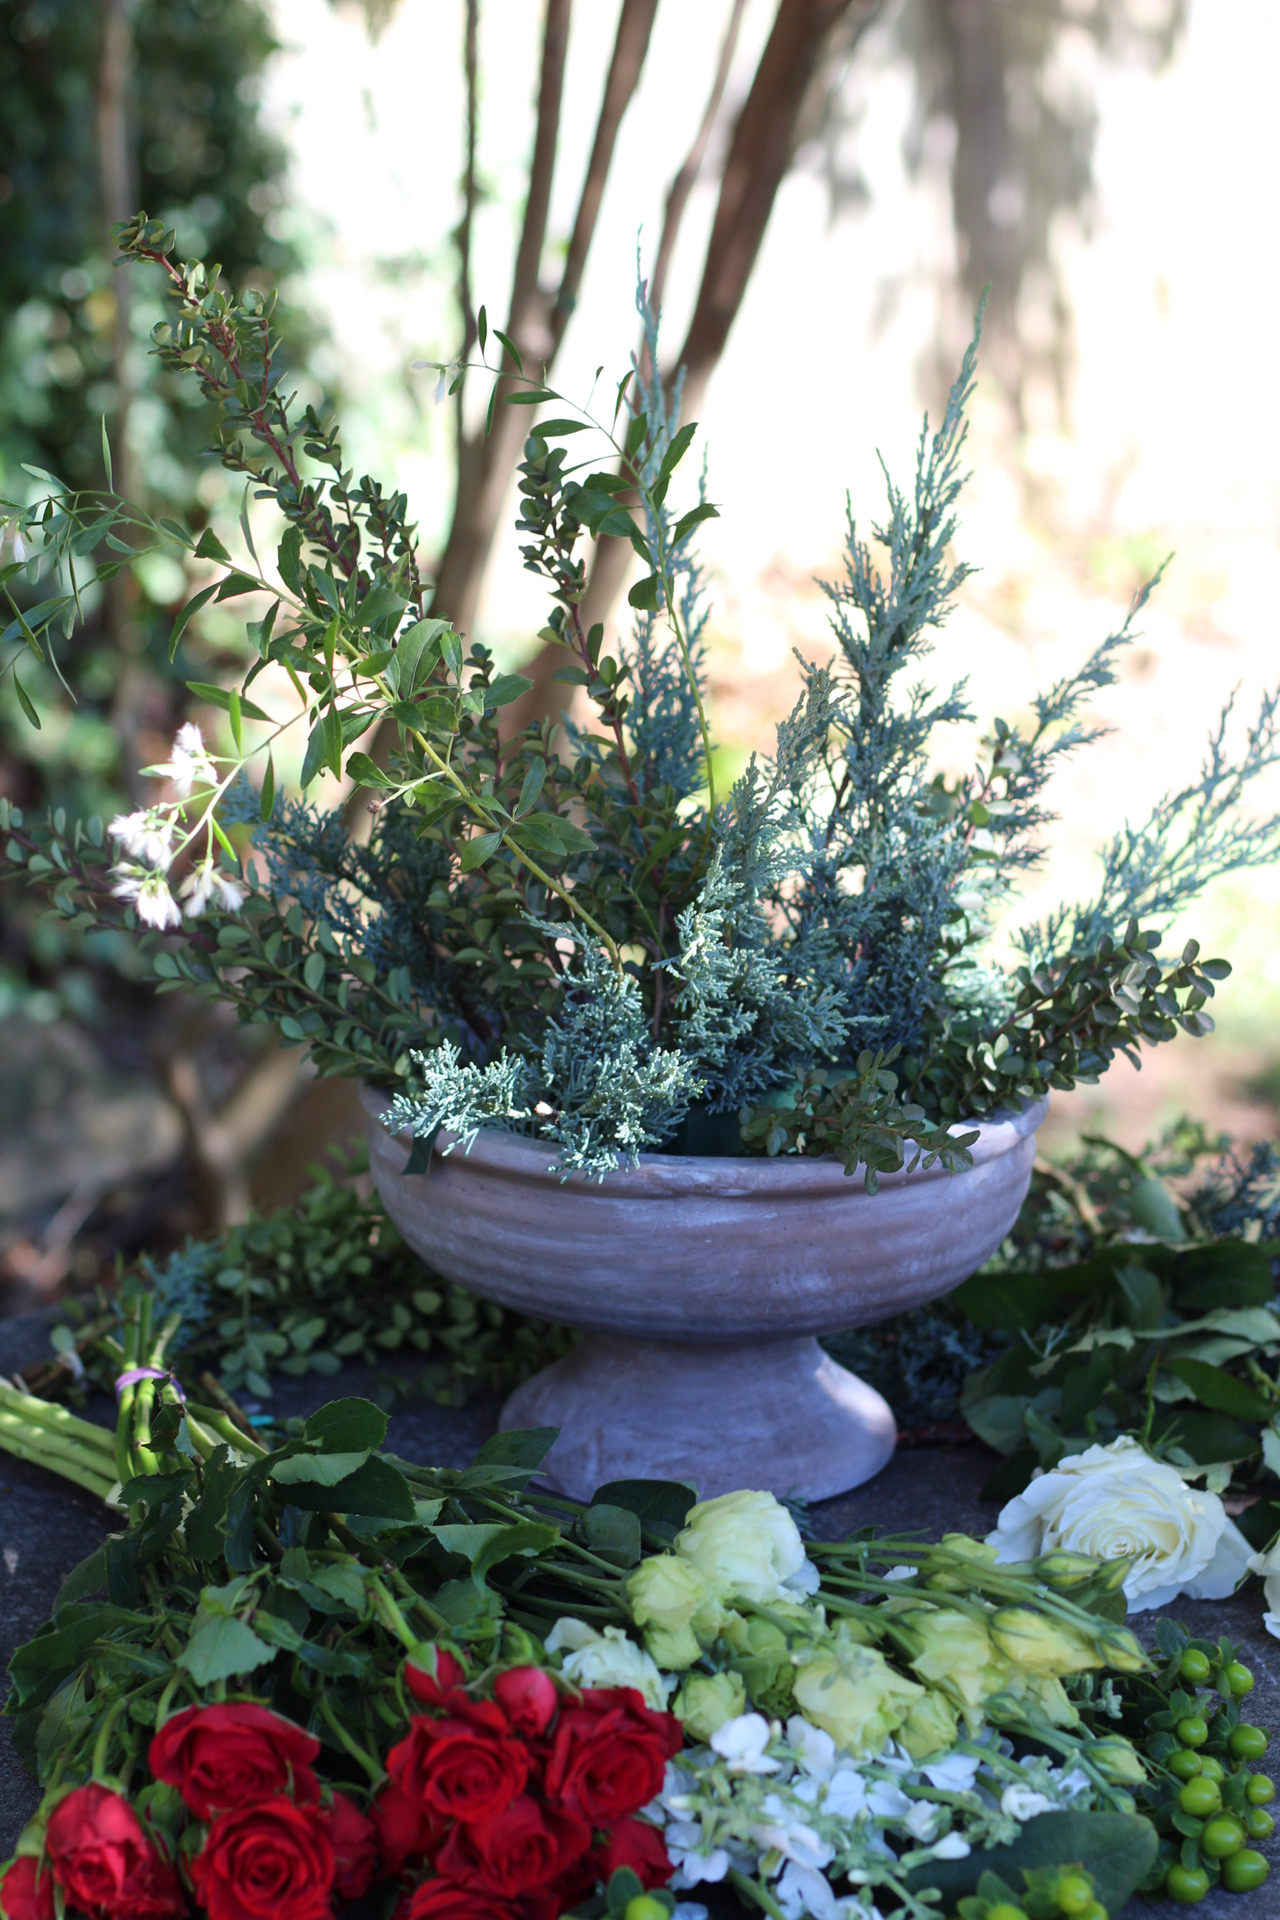
Greenery (5-7 pieces)
-
Line Flowers: I used Canterbury Bells here!
-
Face Flowers: Feel free to pick multiple varieties, I used White Roses here!
-
Stems of Filler: Feel free to pick three varieties of filler, I used red spray roses, Lisianthus, Hypericum berries and yard clippings here!
Picking Blooms: Start by selecting fresh cut flowers. Everything I used here can be found at a grocery store or in your own yard!
Tip: Pick the blooms that are just starting to open, have firm stems, healthy leaves, healthy petals, and are standing tall.
Processing Your Flowers: Strip your stems of all of the leaves and stray pieces. These stems will be covered by water. When you begin arranging you will cut all stems according to length, but when processing, cut them diagonally approximately 1 inch from the bottom to keep them fresh. Cutting your stems diagonally will help your flowers absorb the floral life and water in the container.
Preparing Your Vase: Start with a clean vase, and grid the top with floral tape. Then you can add in a packet of flower food. If you’re getting these from the grocery store the flowers should come with floral food, if not, add a teaspoon of sprite to keep water fresh.
Creating Your Arrangement:
1. Green the base of your container: Layer in your different stems of greenery from one corner to the next. I suggest varying the height of each stem throughout the grid. Be sure to be mindful of the height of the arrangement if you are putting this in the center of your dining table!
2. Place your line flowers: Next you will layer in your line flowers in a triangle shape placing three line flowers, two on the bottom corners and one on the top middle. I used Canterbury Bell for this arrangement. Note: Don’t be afraid to rearrange and move things around!
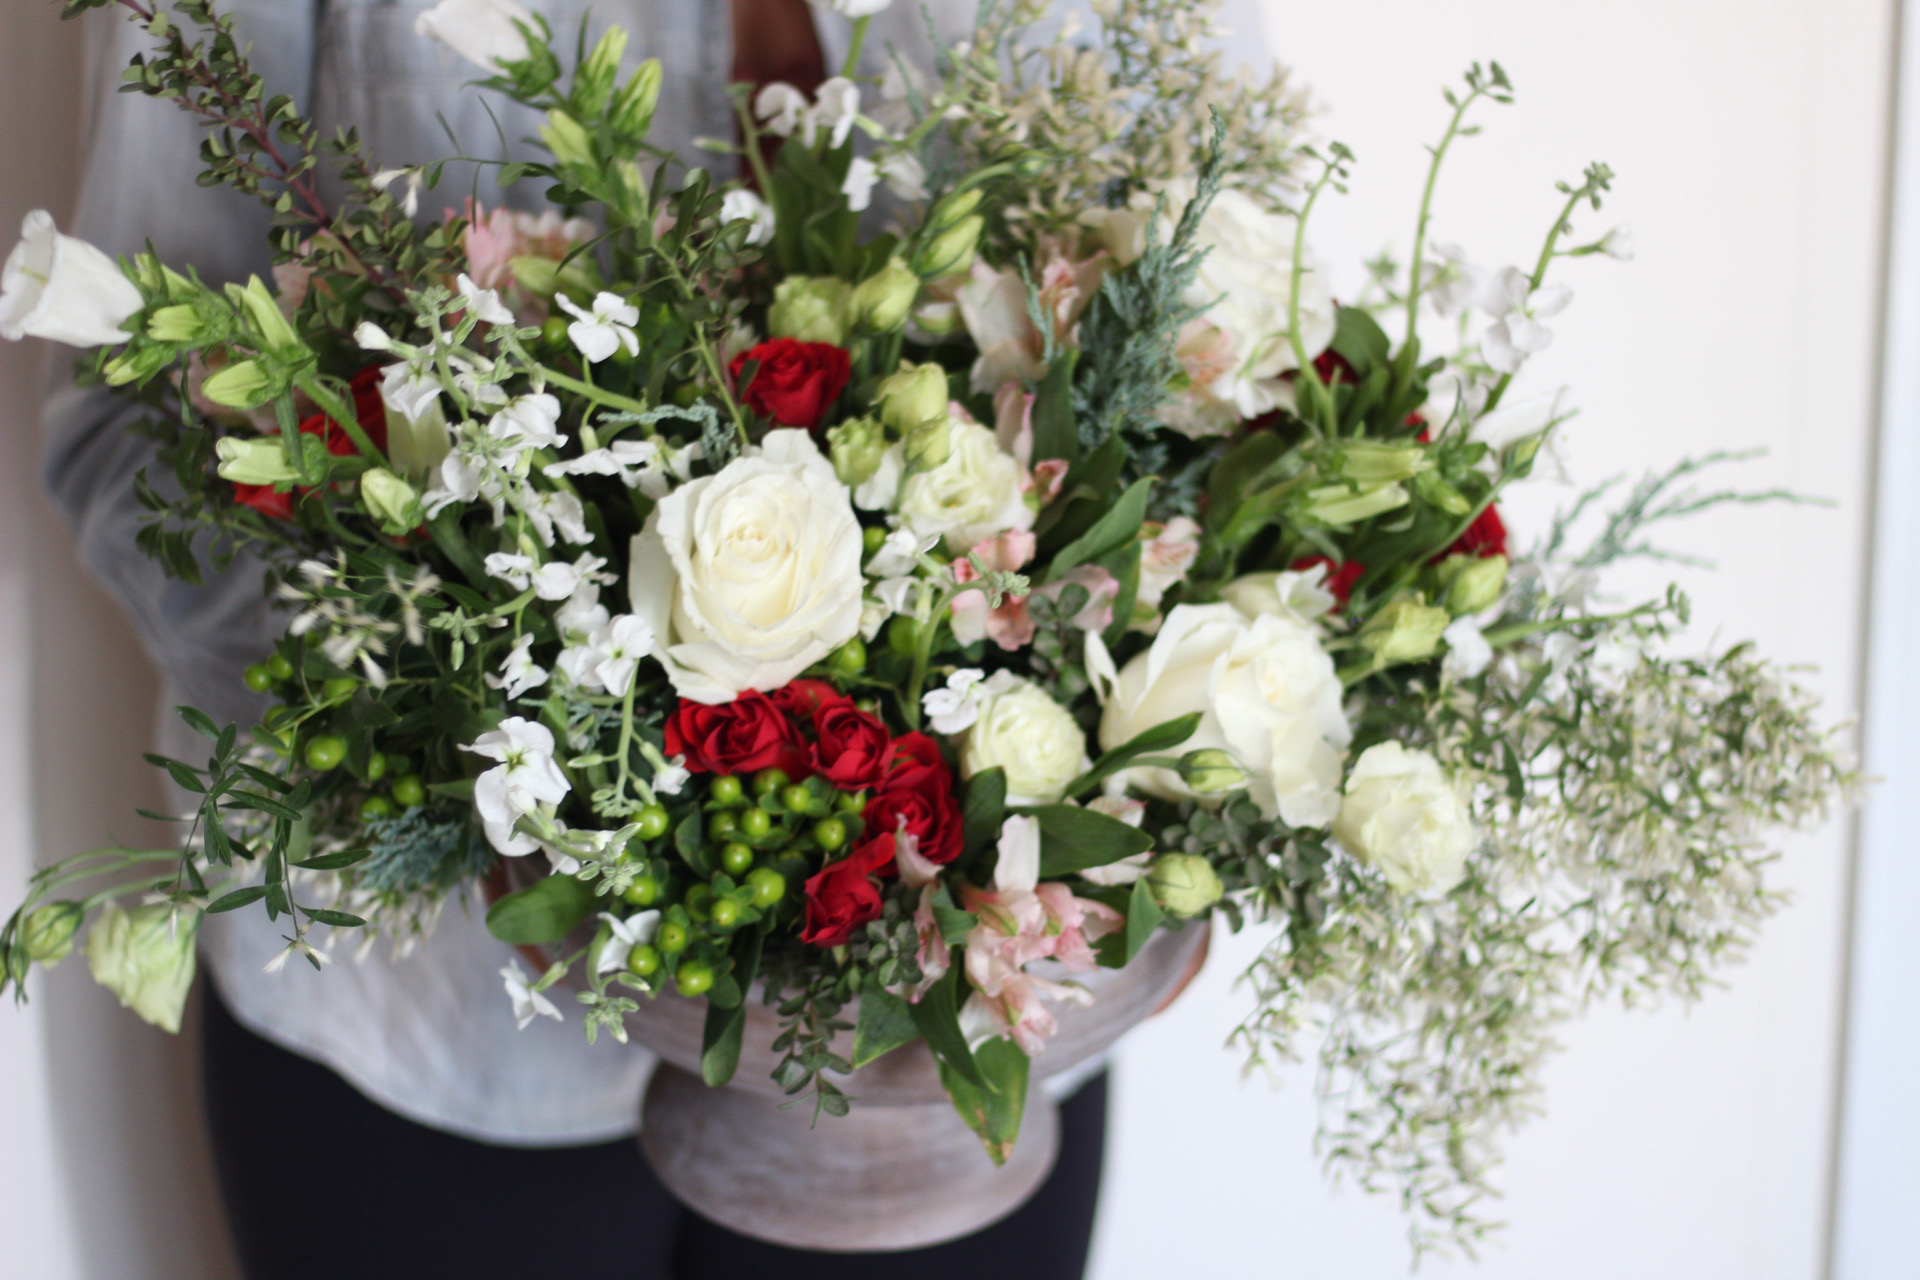
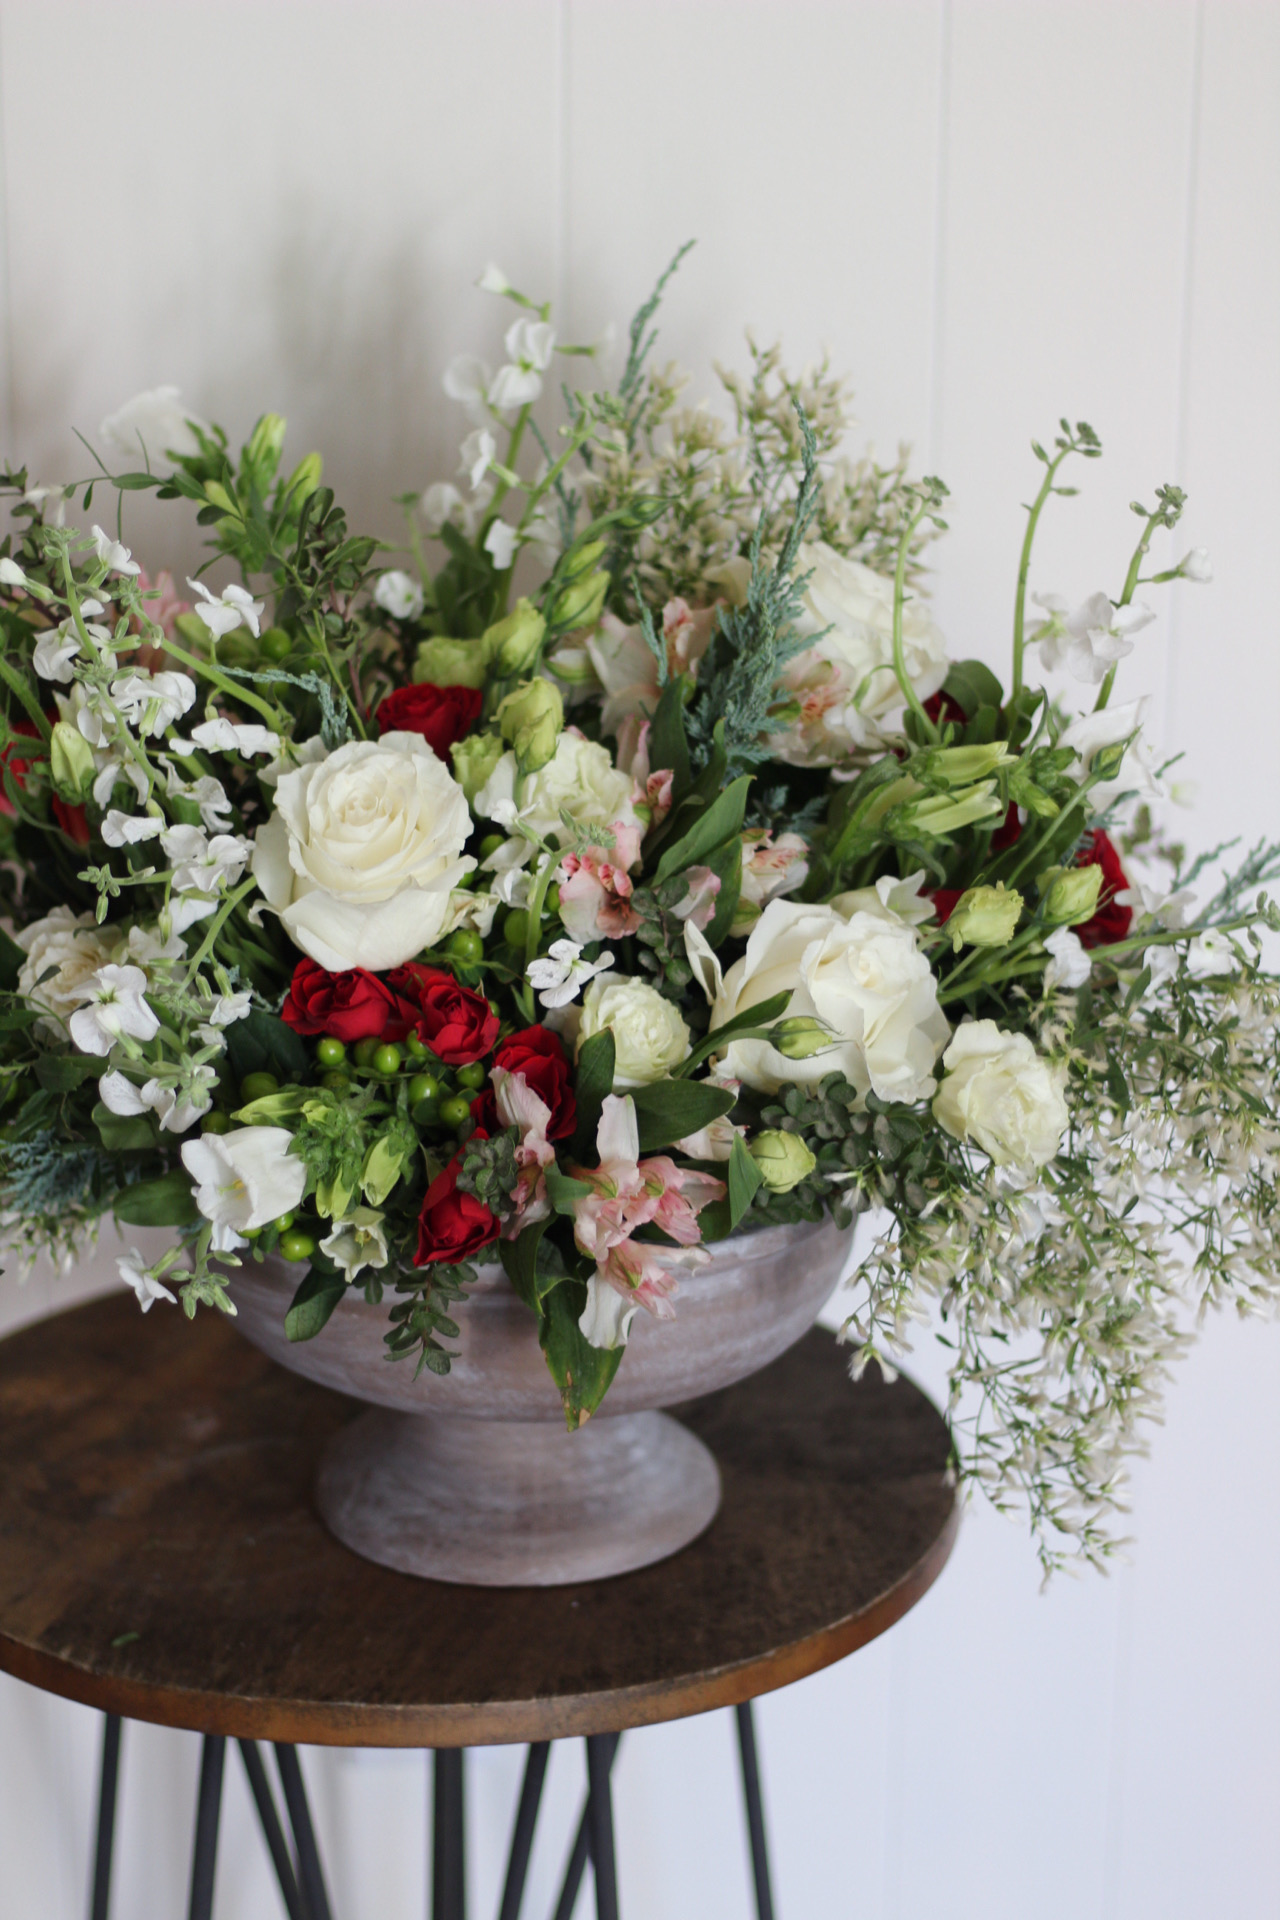
3. Place your Face Flowers: You will begin placing your face flowers opposite the triangle. Place your larger face flowers in the center. You will then feed the line flowers into your face flowers. The other face flowers can be placed at varying angles and heights. You can place them in groupings if you desire. I used standard white roses in this arrangement.
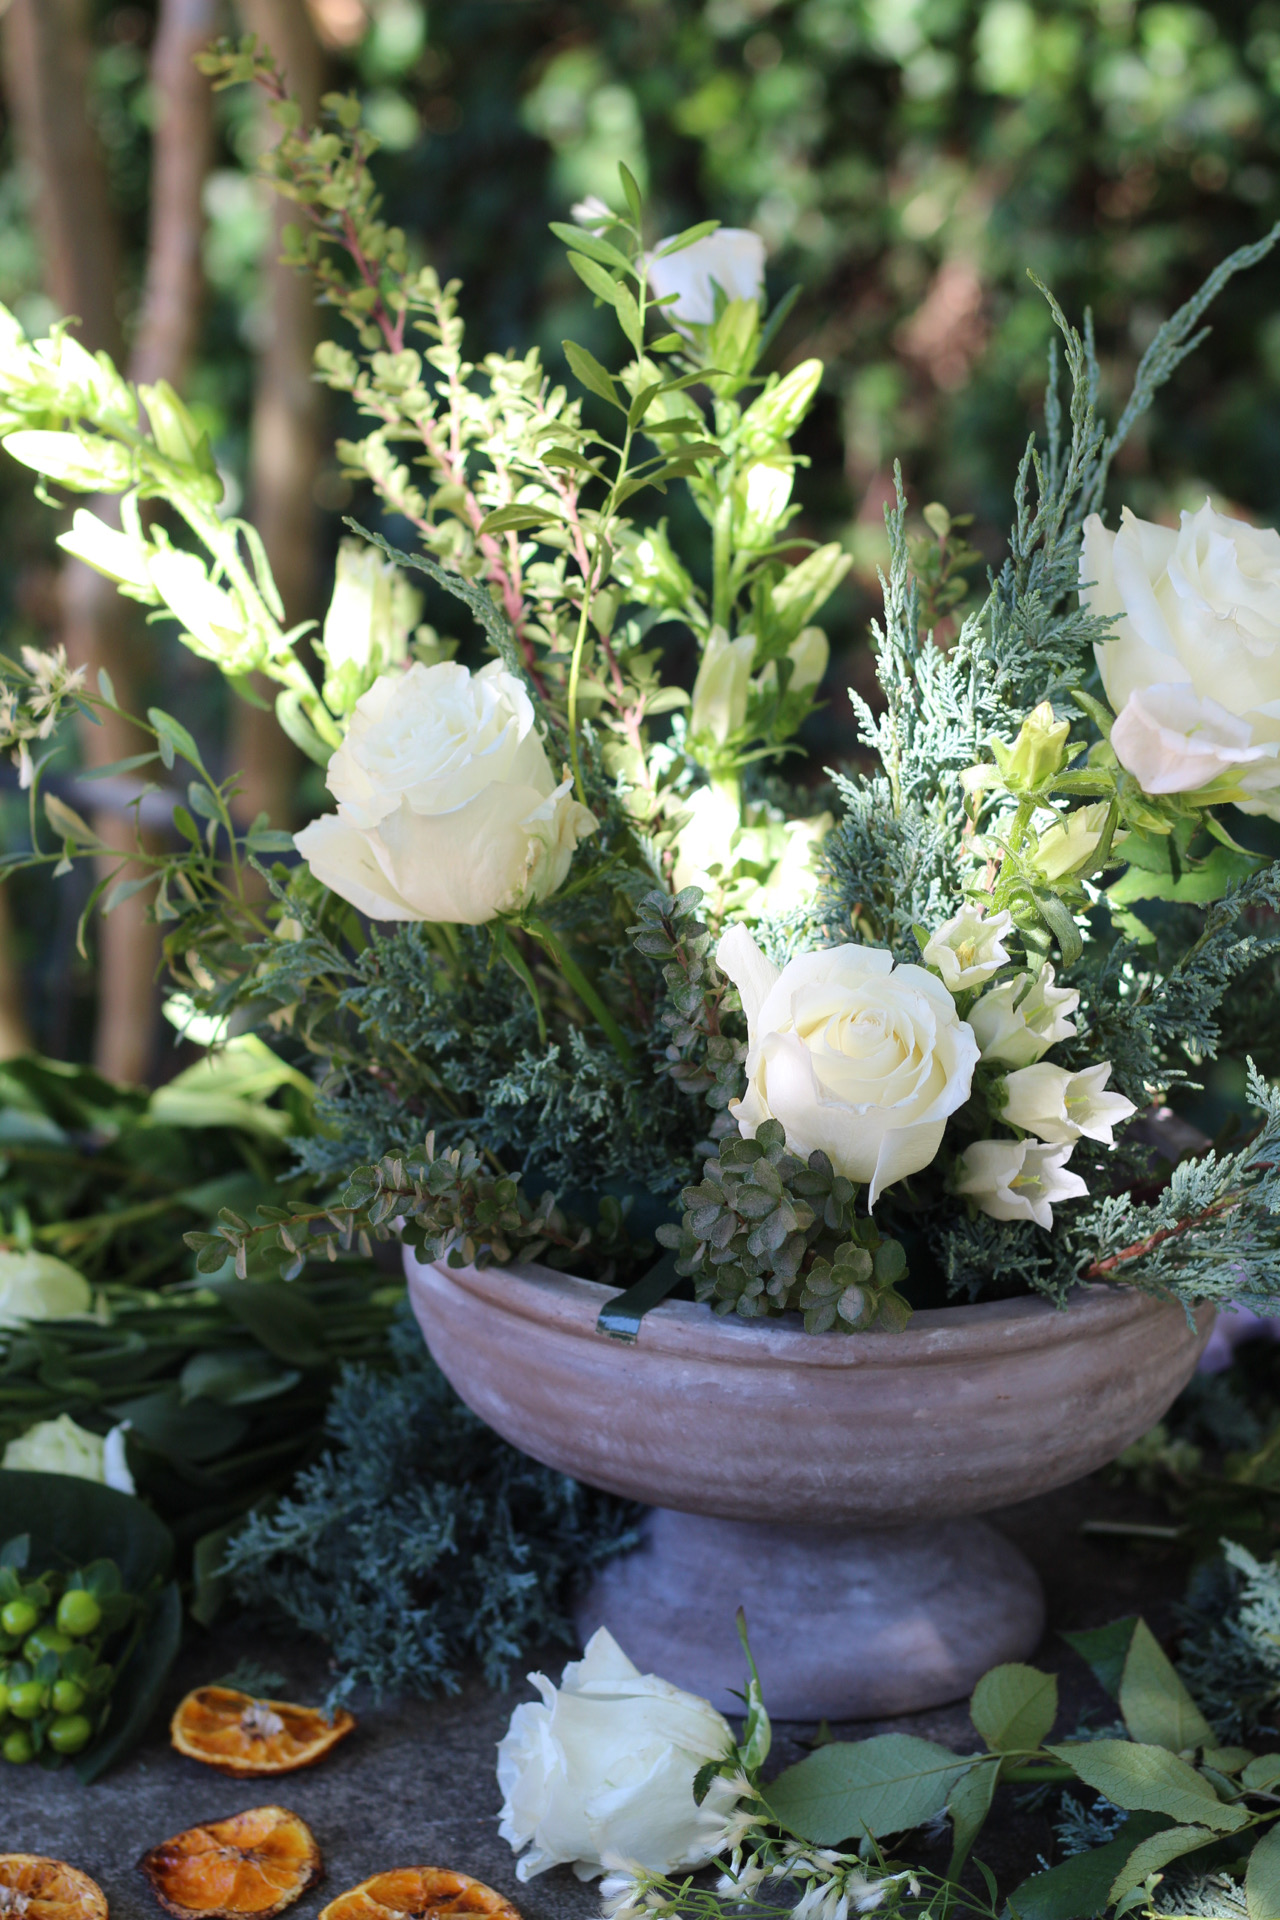
4. Place your Filler Flowers: This is the last step of arranging. At this point in the process you are marrying all of the florals together to fill in the gaps and holes. I used spray roses, Lisianthus, Hypericum berries and yard clippings here!

Once you’ve layered in your filler florals, you will have aesthetically connected the line and face florals. This should finish out the arrangement with a full and lovely look.
If you decide to make this arrangement, we would love to see! Be sure to tag @dosaygive and @huckleberry_collective so we can see! Thank you, Christina for joining us today!


What do you think?